How to Uninstall FFmpeg on Linux (Ubuntu), Windows and MacOS? The Complete Step-by-Step Guide
FFmpeg is a very useful software for encoding, decoding, transcoding, multiplexing, demuliplexing, streaming, filtering and playing pretty much any multimedia file such as video, audio and subtitles. However, sometimes, for whatever reason (version change, recurring errors, etc), you may want to uninstall it from your computer.
Now, uninstalling FFmpeg is not always easy, especially when you don’t know how to proceed.
Fortunately, Debugbar has prepared this little guide to explain to you in detail how to completely remove FFmpeg from Ubuntu, Windows and MacOS. Follow the steps to cleanly uninstall FFmpeg without any leftovers on your device!
How to Uninstall FFmpeg on Windows?
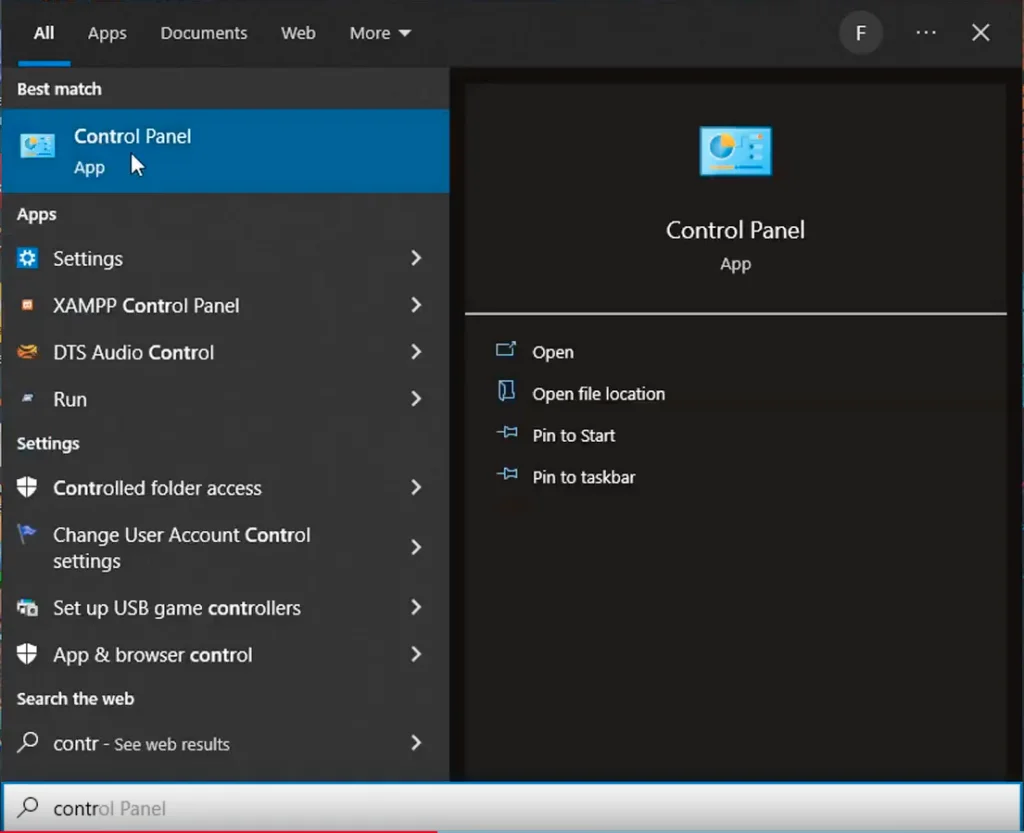
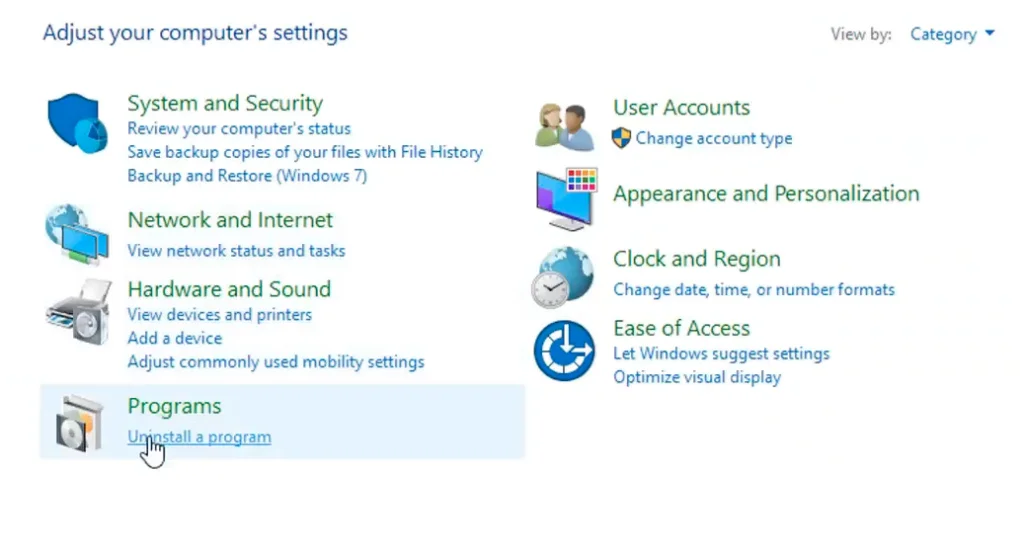
On Windows, uninstalling FFmpeg is done via the control panel. Here are the steps to follow:
- Click the Windows icon on the bottom left of your screen.
- Go to Control Panel > Programs > Programs and Features.


- Find FFmpeg in the list and select it.
- Click the “Uninstall” button.
- Wait for the uninstallation to complete.
- Restart your computer once the uninstallation is finished to finalize the process.
And voila! FFmpeg is now removed from your computer.
If FFmpeg does not show up in the list of programs, you can:
- Open the Windows cmd prompt by pressing Windows + S keys.
- Write “locate ffmpeg” (without quotes).
- Once located type “make uninstall” and hit enter.
This should completely remove FFmpeg and its dependencies.
How to Uninstall FFmpeg on Ubuntu?
On Linux (Ubuntu distribution for instance), too delete the ffmpeg package:
- Open a terminal window.
- Type sudo apt-get remove ffmpeg and validate.
- Then sudo apt-get autoremove to delete unused dependencies.
- Then sudo apt-get purge ffmpeg to also erase configuration files.
- Reboot your machine to complete uninstallation.
Good to know: you may encounter problems removing ffmpeg from your computer if Ubuntu 12.04 is installed on your computer. So, if you’re using this version of the system, you may not be able to uninstall the package using the above method because the ffmpeg program is provided by Libav-tools in this Ubuntu version. So, instead, you will need to write the following command:
sudo apt-get –purge remove libav-tools then sudo apt-get –purge autoremove
To check that the FFmpeg package has been correctly removed, you can type ffmpeg -version. If FFmpeg has been properly uninstalled, this command should return nothing.
How to Uninstall FFmpeg on MacOS?
On MacOS, the process is a bit more manual:
- Open Finder
- In the top menu click “Go” then “Go to Folder“
- Type “Library/Application Support/ffmpeg“
- Once in the “libs” directory, delete the FFmpeg folder
- You will be asked for your admin password to confirm deletion
- Reboot your Mac to complete the uninstallation
And voila, FFmpeg is gone! You just cleanly removed it from your Mac.
How to Uninstall FFmpeg in a Nutshell…
To summarize, here are the key points for removing FFmpeg:
- On Windows, uninstall via the control panel
- On Linux, use the terminal and use the appropriate commands. If Ubuntu 12.04 is installed on your device, you’ll have to type : purge remove libav-tools.
- On MacOS, manually delete the FFmpeg folder in Finder
- Remember to restart your machine after uninstalling
By following this tutorial, you should be able to easily uninstall FFmpeg from your computer. Feel free to adapt the commands for your Linux distribution. The main thing is to cleanly remove FFmpeg files and dependencies. Your machine will be freed from FFmpeg in just a few simple steps!