How to Uninstall DirectX on Windows? The Complete Step-by-Step Tutorial
DirectX is a technology developed by Microsoft to improve graphics and audio performance of video games on Windows. Although essential for an optimal gaming experience, sometimes you may want to uninstall it.
However, this software does not uninstall easily…
But don’t worry, Debugbar will explain to you how to properly uninstall DirectX from your Windows PC step-by-step.
What You Absolutely Need to Know Before Uninstalling DirectX
Before hastily uninstalling DirectX, it’s important to know that this is not a trivial operation and can cause some issues or malfunctions because:
- DirectX is closely tied to the functioning of Windows. Uninstalling it, even partially, can destabilize your operating system.
- Many games and multimedia applications rely on DirectX components. Removing them may make them unstable or unusable.
- The different versions of DirectX (9, 10, 11…) interact with each other. Uninstalling one can affect others.
So before considering uninstalling DirectX, make sure it is really necessary. A simple reinstall or update could be enough to fix potential issues.
If the uninstall is essential, be sure to back up your data beforehand and follow all the steps detailed in this tutorial.
How to Uninstall DirectX on Windows?
DirectX 11 and 12 are the most common DirectX versions. To properly uninstall them on Windows, you will need to follow this method:
1. Try Repairing DirectX
The first thing to do before trying to uninstall DirectX is to try repairing it:
- Launch the Windows Run dialog box “Windows key + R” and type “dxdiag” then press “OK“.

- Then check in the different tabs of the dxdiag diagnostic tool for any error messages. If so, you can try reinstalling DirectX.
- Go to the Windows website and download the file that matches your DirectX version and run it to properly reinstall DirectX.

- Restart your computer and see if the error messages persist.
If the errors persist despite this, you can then move on to the next step.
2. Reset Your System
If the first step didn’t work, the other solution is to restore your system (this can already fix a lot of issues):
- Temporarily disable the anti-virus and Windows system protection as these could interfere with the uninstall.
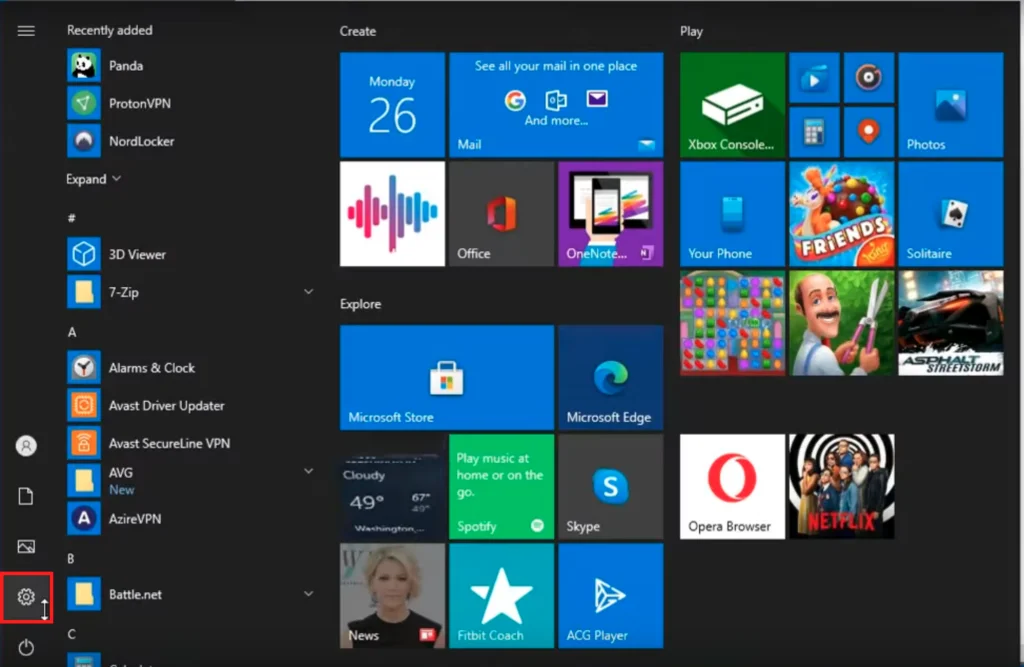
- Press the Start / Windows icon in the bottom left corner of your screen.
- Click the gear icon to access your computer’s settings or type “update and security” if you have a version of Windows 11 that looks different.
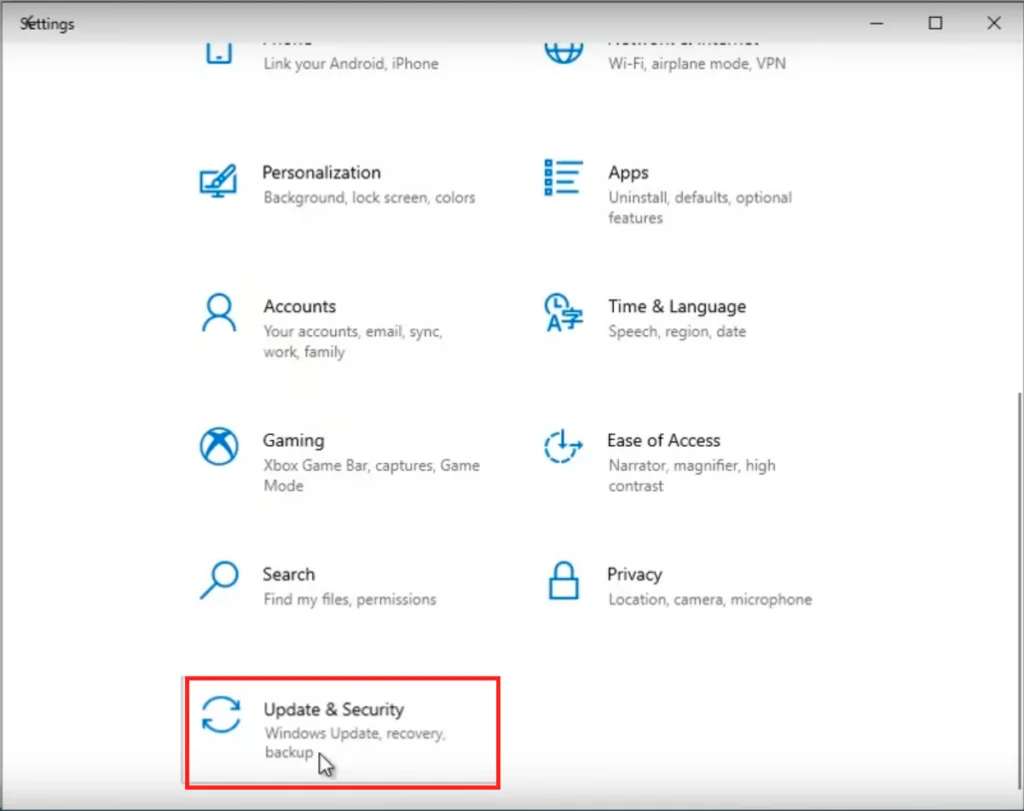
- Click “Update and Security“.
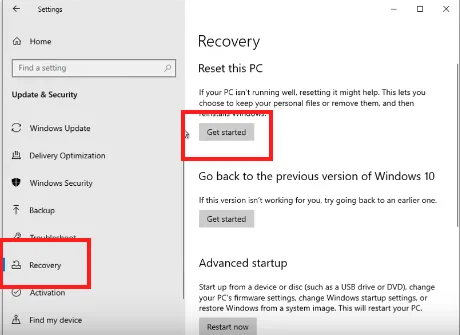
- Go to the “Recovery” tab in the left column.
- Then click the “Get started” button below “Reset this PC“.
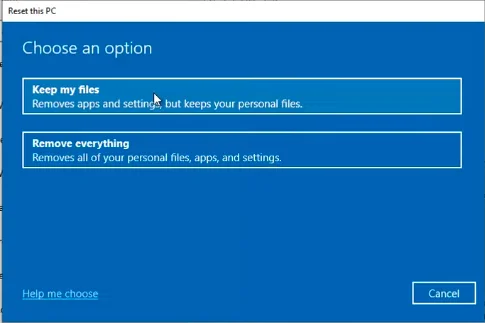
- Select “Keep my files“.
- Select “Local reinstallation“.
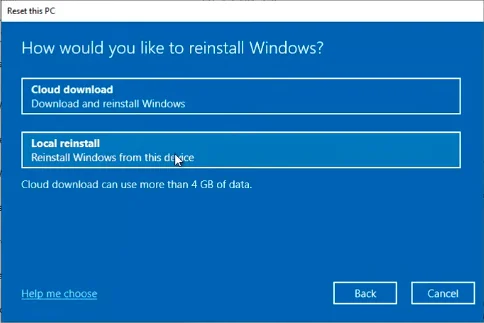
- Then, redo the whole process up to step 6. Under “Go back to the previous version of Windows“, click “Get started” to restore your version.
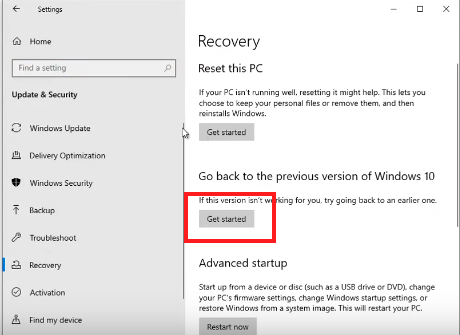
Simply reverting to the previous version can fix issues caused by an update that didn’t go well with your system.
If that wasn’t enough, you could then try removing DirectX from your system (at your own risk).
3. Remove the DirectX Files from Windows
- Click the Start / Windows icon at the bottom of your screen then type “Registry Editor” in the search bar.
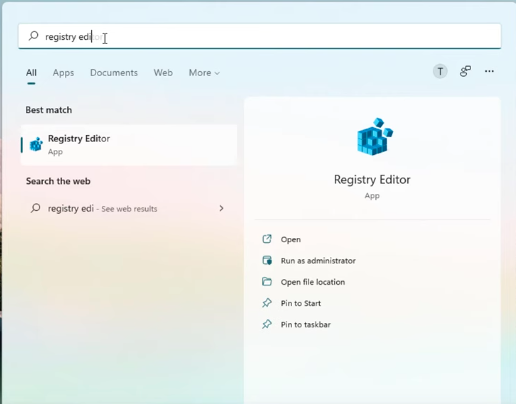
- Open the Registry Editor and find the HKEY_LOCAL_MACHINE folder then open the following sub-folders: SOFTWARE > Microsoft > DirectX.
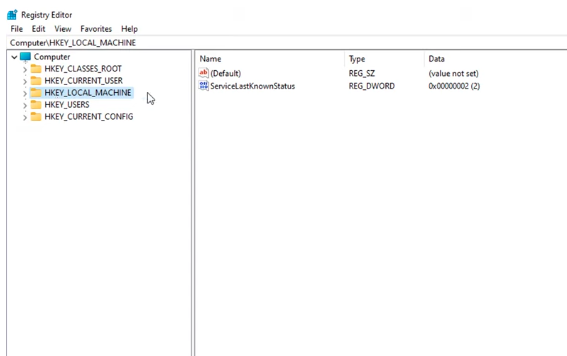
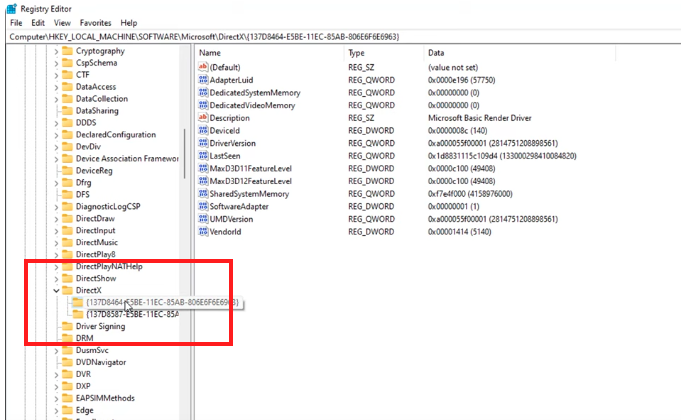
- Once the DirectX subfolder is opened in the left column, right-click on it and click “Delete“.
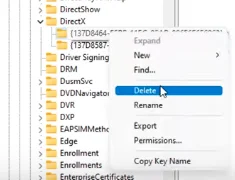
- Restart the computer again to finalize the uninstall.
Once DirectX is properly removed, you can re-enable Windows antivirus and system protection.
How to Uninstall DirectX in a Nutshell…
In summary, uninstalling DirectX on Windows is not without risk. Some precautions need to be taken:
- Check that you have no alternative to uninstalling.
- Back up your data before starting.
- Avoid uninstalling it completely, at the risk of performance or stability issues.
