How to Uninstall (and Reinstall) Angular CLI?
Angular is a popular framework for building robust web applications that uses a command line tool called Angular CLI to facilitate creating, developing, and maintaining projects.
However, sometimes you may run into issues with your Angular CLI installation and need to uninstall it before potentially reinstalling it.
So Debugbar has put together this handy step-by-step guide to help you thoroughly uninstall Angular CLI and all its components from your system and (optionally) upgrade to the latest version.
1. Check the Current Angular CLI Version Installed on Your Machine
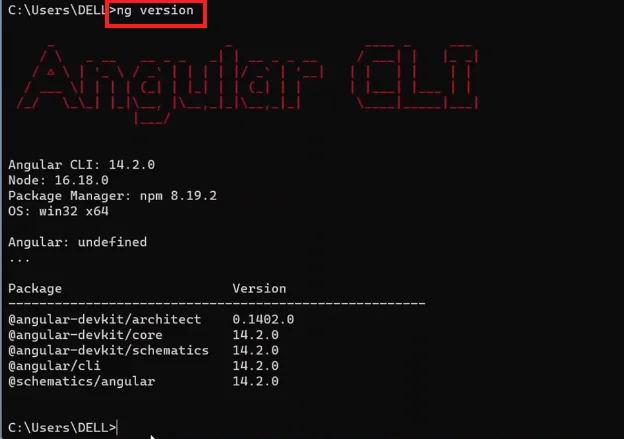
Before uninstalling Angular CLI, it’s good to check what version is currently installed on your computer. Open a terminal or command prompt whether you’re on Windows, Mac or Linux and run the following command:
- ng version

This will show you the version number of the Angular CLI as well as other info about your Angular environment. Make a note of the version somewhere you can easily find it again, as this can come in handy later.
2. Fully Uninstall the Angular CLI Package from Your System
Once you’ve identified the Angular CLI version, you can move on to the uninstall step. Since Angular CLI is an npm package, you’ll use Node.js‘s package manager to remove it.
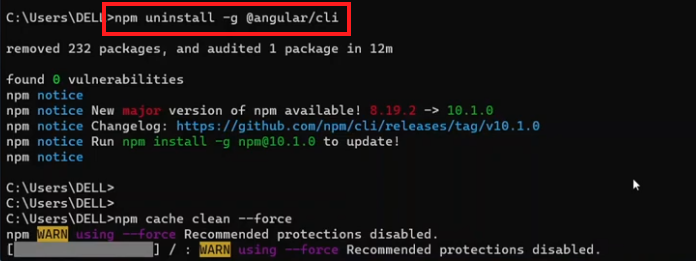
To do so, run the following in your terminal:
- npm uninstall -g @angular/cli

The -g flag specifies a global uninstall, meaning Angular CLI will be removed from your system rather than a specific project.
3. Clear the npm Cache to Avoid Potential Version Conflicts
After uninstalling Angular CLI, it’s recommended to clear the npm cache to ensure future installs happen cleanly without being affected by old files.
You’ll need to use one of the following commands depending on your npm version:
- For npm 5 and above:
npm cache verify
- For pre-npm 5 versions:
npm cache clean –force
This will wipe cached data associated with npm on your machine.
Now, Angular CLI should be completely removed from your device. To verify, you can rerun the command from Step 1:
- ng version
You can then, if desired, install Angular CLI fresh.
4. Install the Latest Version of Angular CLI Globally (Optional)
Now that you have a clean installation, you can get the latest Angular CLI version.
To do so, run this command in your terminal:
- npm install -g @angular/cli@latest
The @latest flag ensures you’re installing the most recent available version of Angular CLI globally.
5. Update Existing Angular Projects in package.json If Needed
If you have existing Angular projects you want to migrate to the new Angular CLI version, navigate to each project directory in the terminal and run:
- ng update @angular/cli @angular/core
This will update the main Angular components in your package.json and adapt your application if necessary.
6. Verify the New Angular CLI Version is Correctly Installed
Finally, verify that the latest Angular CLI version installed properly by typing again:
- ng version
You should now see the number for the new Angular CLI version, confirming the update was successful.
Uninstalling and upgrading Angular CLI may seem daunting but by following these few steps you can do it with confidence.
Having the latest version gives you access to new features, bug fixes, and performance improvements for your Angular projects. Don’t forget to back up your work before starting the process and take time to thoroughly test your application after upgrading. With a clean Angular CLI install, you’re now ready to build amazing web apps!