How to Swap Faces: A Fun and Easy Guide
Have you ever found yourself chuckling at a comically face-swapped photo, and wondered, “How did they manage to do that?” Or perhaps you’ve come across a movie poster with hilariously swapped faces and thought it would be a fantastic prank to play on your friends? If so, then you’ve come to the right place, because we’re going to guide you on how to do it yourself.
Firstly, you need software that provides the tools for the job. Our program of choice for today is PhotoWorks – an intuitive PC photo editor that simplifies the process of photo editing. Regardless of whether you’re a seasoned professional or a complete beginner in photo editing, this guide is designed to walk you through the entire process, step by step. We’ll also share some tips and tricks to help you create the most realistic and side-splitting face swaps. So, fasten your seatbelts, let your creativity run wild!
Step 1: Get Your Hands on PhotoWorks
First things first, you need to have PhotoWorks installed on your PC. Just head over to the official PhotoWorks website, download the software, and follow the installation instructions.
Step 2: Choose Your Photos
Now, let’s pick the photos you want to work with. You’ll need at least two photos: one with the face you want to swap in, and another with the face you want to swap out. Make sure both faces are clear and well-lit to get the best results. Brightness, resolution, saturation – the more matching parameters your photos have, the better.
Step 3: Open Your Photo in PhotoWorks
Once you’ve chosen your photos, open the photo with the face you wish to cut out. You can do this by clicking on ‘File’ and then ‘Open’, or simply by dragging and dropping the photo into the workspace.
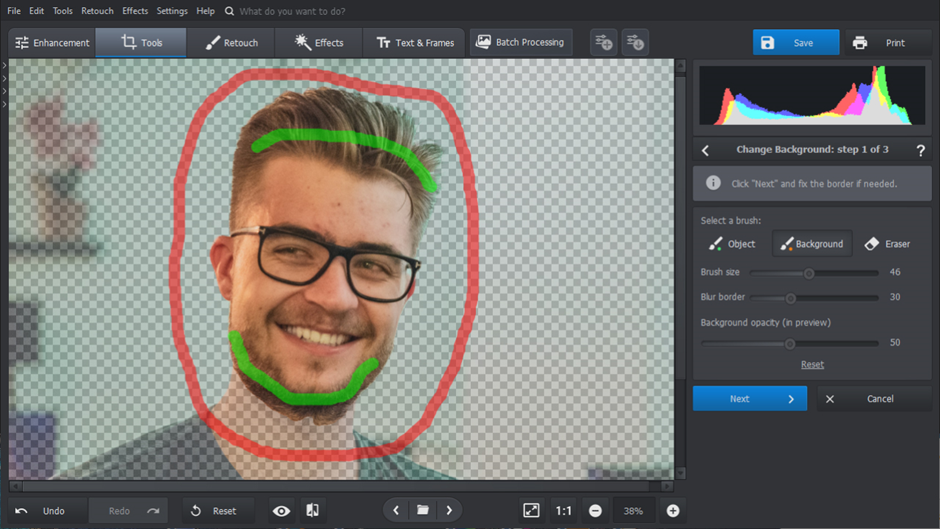
Step 4: Select the Face You Want to Swap
Now, it’s time to select the face you want to swap. To do this, go to the ‘Tools’ tab and select the ‘Change Background’. Use the green brush to carefully outline the face you want to swap. Use the red one to mark everything else. Take your time with this step – the more precise your selection, the better the final result will be!
Step 5: Remove the Leftovers
On the next screen use the same green and red brushes to restore or remove small details missed by the algorithm.
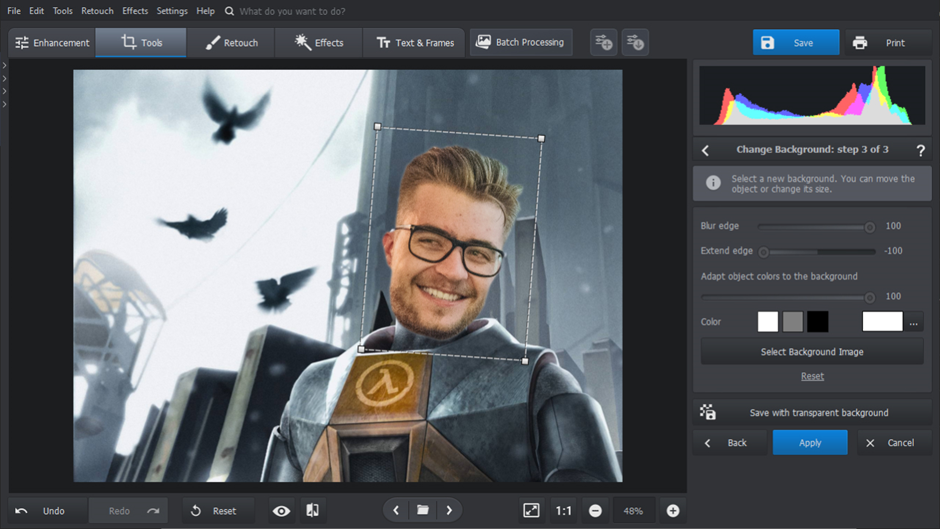
Step 6: Add the Target Photo
Now upload the photo with the face you wish to replace. You can freely adjust the size, position and border softness of your cutout to achieve a perfect blend.
Step 7: Add a Finishing Touch
The final step is to blend the faces together. PhotoWorks has a dedicated slider that allows you to match colors and lighting in a single motion. This will make the face swap look more natural.
And voila! You’ve successfully swapped faces in a photo using PhotoWorks!
Considering Other Software
While PhotoWorks is a fantastic tool, it’s not the only face swap software for PC. Depending on your needs and level of expertise, you might find other programs more suitable.
For instance, if you’re a professional looking for advanced features, Adobe Photoshop might be a better fit. It offers a wide range of tools and capabilities, but it also has a steeper learning curve.
On the other hand, if you’re a beginner looking for a simple and straightforward tool, you might want to consider software like Face Swap Live or MSQRD. These programs are user-friendly and perfect for quick and fun face swaps.
Tips for a Perfect Face Swap
Before we wrap up, let’s go over some insider tips to help you master the art of face swapping. These nuggets of wisdom will ensure your face swaps are not just good, but great! So, let’s dive in:
- Choose the Right Photos: The key to a successful face swap is choosing the right photos. The faces should be of similar size and lighting for the best results.
- Take Your Time: Don’t rush the process. Take your time to select and blend the faces carefully.
- Practice Makes Perfect: The more you practice, the better you’ll get at face swapping. So, keep experimenting and have fun!
- Use High-Resolution Photos: For a more convincing face swap, it’s recommended to use high-resolution photos. These provide more detail to work with, which can significantly improve the final result.
- Experiment with Different Tools: PhotoWorks offers a variety of tools for editing photos. Don’t limit yourself to just the face swap feature. Feel free to experiment with other tools to achieve the best results.
So, there you have it, folks! A step-by-step guide on how to swap faces in a photo using PhotoWorks. Now, go ahead and create some hilarious and unique photos!